
Merry Christmas
We've been busy! Someone stopped by the house today and said she hoped we would be finished with the house by next Christmas...arrgghhhh!! I said something clever like " We will be unless...uhhhh....we're dead or something." People just don't understand the time it takes to build especially when it's not a production build. Oh well, some just don't get it.
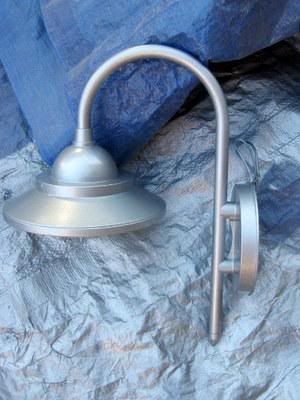
Here are the exterior lights I painted yesterday. They were a powder white and we wanted them to look galvanized. There are some excellent spray paints on the market now and you can get just about any finish/look you want. I LOVE paint! I think the lights look great-they will be on either side of the garage door, one on the people door of the garage and 2 on the south entry.
These I found on eBay for the ridiculous price of about $9.00 apiece. They are very sturdy lights and came with compact fluorescent bulbs-GONGA d
 eal.
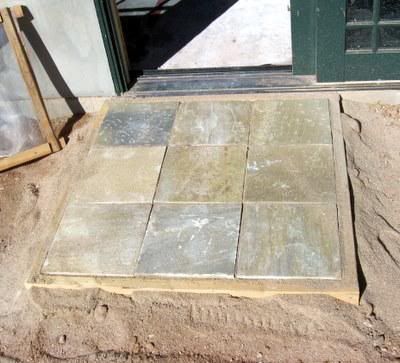
eal.Here are the "stoops" we made in order to be able to get our CO. This is the slate I found on Craigslist and will eventually be the front porch/patio but for now it's appearing as the door stoops. The coloration of the slate is beautiful.
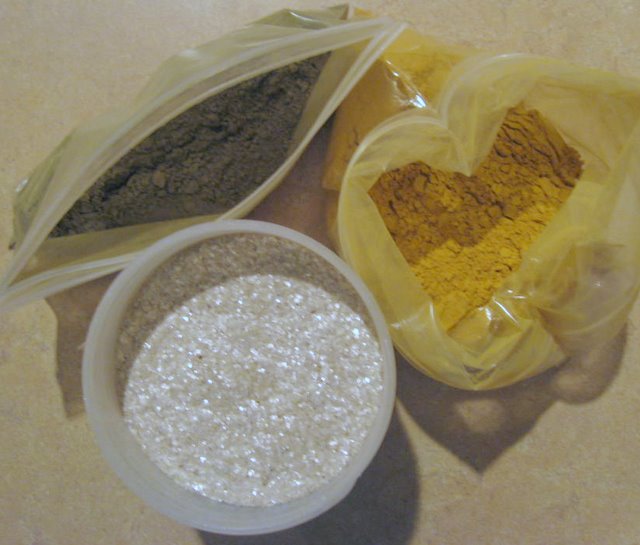
My project for today was to tape the joints on the brown walls. We asked that the rockers hang the rock wrong side out so that I would have a unsealed surface to apply the earthen plaster. When Rick asked the contractor if he had ever hung drywall brown side out he replied: "Not on purpose". I taped the joints with the standard mesh tape and homemade joint compound. To make this I used clay and a bit of sand sifted through a window screen. To the dry ingredients I added water and allowed the clay to hydrate. I then added a bit of homemade wheat paste (cooked flour/water). When combined it looks like chocolate mousse, almost good enough to eat. I taped the seams and applied the mud as usual but didn't have to worry about smoothing it as another layer of earthen plaster will be applied. One bright note, if you've ever drywalled you know you have to be careful of the "mud" drying because it leaves "rocks" in the mix which makes the knife work difficult to say the least. With the real mud this is not a problem, it all just mixes together and re-incorporates beautifully.

This is looking into our compact kitchen-it will be so efficient. Lovin' it!

This is a shot of one seam mudded, one seam just taped and the brown side of the drywall.

 Cooking lunch in our solar oven.
We may work some tomorrow-or we may just sit, listen to Christmas carols and drink coffee. No matter, we wish you and yours a Merry Christmas and a Prosperous and Happy New Year!


